


Reduced Radiation Dose : The CS 2200 System generates as much as 30% less radiation than traditional x-ray generators—thereby ensuring the safety of your patients and staff. In addition, the system’s electronic timer determines the optimal dose for patients based on exam settings, so you can work confidently with no worries of overexposure.
Versatile Design : Compatible with both film and digital imaging applications, the CS 2200 System works the way you do. Available in five available mounting options, two types of timers, and three arm lengths, the system can be easily adapted to match the configurations of your practice.
Maximum Image Quality : Our very high-frequency generator ensures superior image quality. Equipped with a focal spot of 0.7 mm, the CS 2200 System produces sharp, focused images each and every time. And the unit’s short exposure times make it an ideal product to use with our full range of dental digital radiography systems.
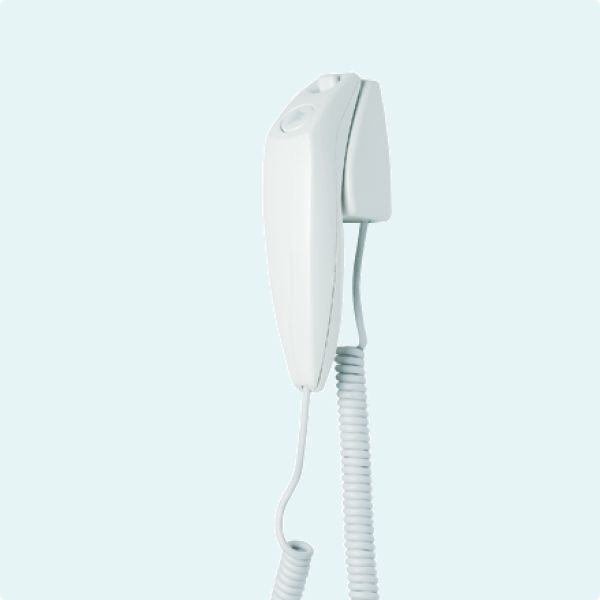
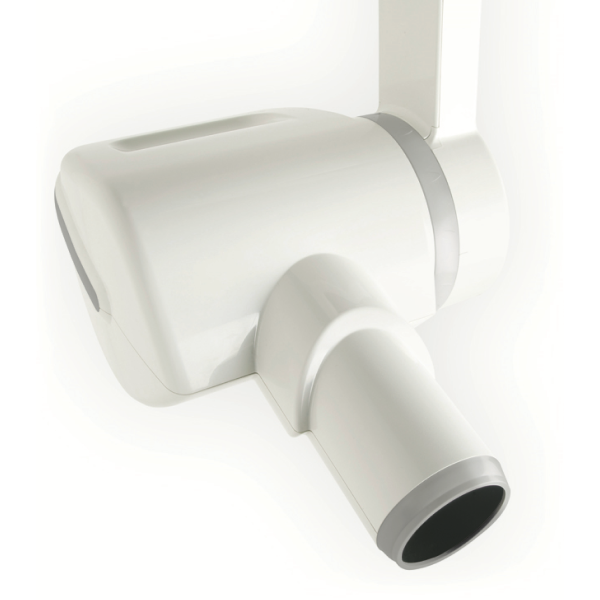
Usability at Its Best : Compact and easy-to-use, the CS 2200 System’s handheld timer allows users to quickly select the right exposure settings. Pre-programmed to automatically calculate settings, the timer intuitively determines the appropriate exposure time based on anatomical region, patient bodyweight and detector type.
- Intraoral x-ray unit
- Maximises diagnostic abilities and improves workflow
- Very high-frequency generator ensures superior image quality
- Pre-programmed to automatically calculate settings, the timer intuitively determines the appropriate exposure time based on anatomical region, patient bodyweight and detector type
- Adjustable tube voltage (60 or 70 kV), so you can customise contrast or grey shading levels based on exam requirements
- Focal spot of 0.7 mm


Delivery Included




If you're about to invest in dental equipment, you could be able to combine your costs and benefit from Advance.
Eligible customers will receive a rebate based on their merchandise and clear aligner spend, which can help cover the cost of your equipment.

Henry Schein Advance
If you're about to invest in dental equipment, you could be able to combine your costs and benefit from Advance.
Eligible customers will receive a rebate based on their merchandise and clear aligner spend, which can help cover the cost of your equipment.
Henry Schein Advance
If you're about to invest in dental equipment, you could be able to combine your costs and benefit from Advance.
Eligible customers will receive a rebate based on their merchandise and clear aligner spend, which can help cover the cost of your equipment.
Manuals/Docs

CS2200-User-Guide


Enquire Now
Ready to buy new equipment? Speak with our equipment specialist today.Will this unit work with digital either sensor or phosphor plate?


Yes, this system will work with all three formats: film, phosphor plates and sensors.
Does this unit have different arm lengths?
Yes, the system has various arm length options to suit your surgery setup.
Is it straight forward to use?
Yes, the system is has simple controls and pre-set exposure times depending on the location of the x-ray in the patients dentition
Does the installation include a test pack?
Yes, the x-ray will be tested by our engineer after installation.
Maintenance
The below describes the maintenance tasks you must perform for your CS 2200.
Quarterly
Generator
Check that:
- The certification label is legible.
- No oil leaks.
Mechanical support
Check that:
- The wall framework is securely attached to the wall.
- All labels are legible.
The scissor arm is stable in all positions.
Control timer unit and electrical installation
Check that:
- The symbols are legible.
- The control timer unit and the power supply cables are in good condition.
- The ground is installed correctly.
- The X-ray exposure button returns to its initial position after use.
Operation
Be careful not to be exposed to ionising radiation
Check that:
- The audible signal is heard and the X-ray emission indicator is visible when you make an exposure (manual mode, 60 kV, 0.1 sec).
- The “E01” message is displayed when you launch an X-ray (manual mode, 60 kV, 1.0 sec) and you release the control button before the exposure end.
Control timer unit self-test
To enable the self-test, you must switch ON the CS 2200 system.
- The self-test starts with a simultaneous display and alarm light test.
- Then, the system test starts. After the test is completed (indicated by a short beep), the firmware version and the total number of exposures (divided by 10) performed by the unit since first installation are displayed.
- If the test fails, an error message is displayed.
If a check result is not satisfactory, stop using the equipment and contact our service team 0800 028 4749.
Annually
We recommend that a general inspection of the unit be carried out by one of our service engineers.
Cleaning and Disinfecting
You must first clean the system before disinfection.
To clean the system, follow these steps:
- Clean the outside of the equipment with a damp paper towel or a soft cloth using an alcohol-based, non-corrosive cleaner.
- Wipe off surfaces with either an intermediate disinfectant or a low-level disinfectant.
Caution
- Liquids must not drip into the equipment.
- Do not spray cleaner or disinfectant directly on the equipment.
- Follow the manufacturer’s safety recommendations when using a cleaner or a disinfectant.
Introduction
Detailed below is a list of error messages which may appear on your unit. Click on a message to see what this means and what action should be taken.
If you do not find the problem below or the action you take does not solve the problem, please contact our support team on 08700 10 20 46. In order to help you, have the serial number of your unit and a description of the error.
Nothing lights up
Possible Cause
The unit is disconnected.
Action
Connect the unit.
Possible Cause
Fuse F1 burnt out or is defective.
Action
Change the fuse.
Possible Cause
The circuit breaker is OFF.
Action
Turn ON the circuit breaker.
Control unit doesn't light up
Possible Cause
The control unit is disconnected.
Action
Connect the control unit.
Possible Cause
Fuse F1 burnt out or is defective.
Action
Change the fuse.
Possible Cause
The control unit is defective.
Action
Call our service team on 0800 028 4749.
No X-ray emission
Possible Cause
The generator is cooling.
Action
Wait until message I01 and the red LED on the control key disappear.
Possible Cause
The radiology control key is defective.
Action
Call our service team on 0800 028 4749.
The X-ray emission works, but the exposure is too light or completely white
Possible Cause
The wrong exposure preset programme is being used.
Action
Change the preset programme.
Setting the Mode
Setting the mode allows you to modify the exposure times according to the sensitivity of the used imaging system.
To set the mode, follow these steps:
- Press Imageto select the preset mode to be modified.
- Press and hold ImageImagesimultaneously for at least three seconds until the display blinks.
- If necessary, modify the setting by rotating Imageuntil the desired setting is displayed.
- To validate, press and hold Imageuntil “COPY” is displayed.
- To abort, press on the selection knob shortly.
Possible Cause
The generator is not positioned correctly.
Action
Adjust the generator position.
Possible Cause
The exposure time is too short.
Action
Increase the exposure time.
Possible Cause
The development time is too short.
Action
Increase the development time (See the manufacturer’s instructions).
Possible Cause
The developer is too cold.
Action
Heat the developer.
Possible Cause
The developer is too old or diluted.
Action
Replace with a new developer.
Possible Cause
The preset mode is not selected properly.
Action
Verify your exposure settings (See the exposure procedure).
Possible Cause
The receptor is not correctly positioned.
Action
Reposition the receptor.
Possible Cause
The unit is not correctly installed.
Action
Call our service team on 0800 028 4749.
The X-ray emission works but exposure is too dark
Possible Cause
The wrong exposure preset programme is being used.
Action
Change the preset programme.
Setting the Mode
Setting the mode allows you to modify the exposure times according to the sensitivity of the used imaging system.
To set the mode, follow these steps:
- Press Imageto select the preset mode to be modified.
- Press and hold ImageImagesimultaneously for at least three seconds until the display blinks.
- If necessary, modify the setting by rotating Imageuntil the desired setting is displayed.
- To validate, press and hold Imageuntil “COPY” is displayed.
- To abort, press on the selection knob shortly.
Possible Cause
The exposure time is too long.
Action
Reduce the exposure time.
Possible Cause
The development time is too long.
Action
Reduce the development time (See the manufacturer’s instructions).
Possible Cause
The developer is too hot.
Action
Cool the developer.
Possible Cause
The developer is too concentrated.
Action
Adjust the concentration or change developer.
Possible Cause
The preset mode is not correctly selected.
Action
Check your exposure settings (See the exposure procedure).
Information Message: I 01 and red LED lights up on the control timer unit.
Possible Cause
Cooling cycle: this message can appear during intensive use period.
Action
Do not switch OFF the equipment. The information message disappears as soon as the system reaches a satisfactory temperature.
If you switch OFF the system, the microprocessor does not calculate the cooling time. For safety reasons, it considers that the system has not gone through the cooling cycle.
Information Message: I 02
Possible Cause
Request for X-ray tube seasoning.
Action
See the “User Mode” section of the CS 2200 User Manual.
Error Message: E01 + audible alarm
Possible Cause
The radiography control button was released before the exposure end. The display indicates the remaining exposure time. Based on this time, you must decide whether to develop the film or make another exposure).
Action
Quickly press on the selection knob to stop the alarm.
Error Message: E02
Possible Cause
The radiography control was enabled while the unit was being powered ON.
Action
Switch OFF, then restart the system. If the problem persists, contact our service team on 0800 028 4749 and stop using the equipment.
Error Messages E03 to E04
Possible Cause
Exposure time control problems.
Action
Switch OFF, then restart the system. If the problem persists, contact our service team on 0800 028 4749 and stop using the equipment.
Error Messages E10 to E18
Possible Cause
kV voltage error.
Action
Switch OFF, then restart the system. If the problem persists, contact our service team on 0800 028 4749 and stop using the equipment.
Error Messages E20 to E24
Possible Cause
Filament voltage error.
Action
Switch OFF, then restart the system. If the problem persists, contact our service team on 0800 028 4749 and stop using the equipment.
Error Message: E30
Possible Cause
Problem with voltage to the main power supply or to the chemical capacitor.
Action
Switch OFF, then restart the system. If the problem persists, contact our service team on 0800 028 4749 and stop using the equipment.
Error Messages E40 to E46
Possible Cause
System error (problems with the power board microprocessor).
Action
Switch OFF, then restart the system. If the problem persists, contact our service team on 0800 028 4749 and stop using the equipment.
Error Messages E50 to E54
Possible Cause
Problem with the IC bus, the connection between the control panel and the power board.
Action
Switch OFF, then restart the system. If the problem persists, contact our service team on 0800 028 4749 and stop using the equipment.
Share


Services and Solutions
)
Henry Schein Direct
Streamline your next equipment purchase with Henry Schein Direct, offering fast-track equipment, remote demonstrations, and expert support – wherever you are.

)
Increasing your practice value
By investing in latest technologies, updating your equipment, and increasing your availability with a new surgery room, you can attract new patients, improve the quality of care you offer, and differentiate your practice from competitors.
)
)
Henry Schein Financial Services
A vast range of financial products and services that are offered through our finance partners nationally
)
SunSchein Clearance
SunSchein offers a wide range of ex-showroom and ex-demonstration dental equipment, including treatment centres, laboratory equipment, and digital dentistry equipment.
)
Dental Equipment
Uncover everything you need for your dental practice, from essential dental equipment to cutting-edge solutions.