Ready for the dental practices of tomorrow
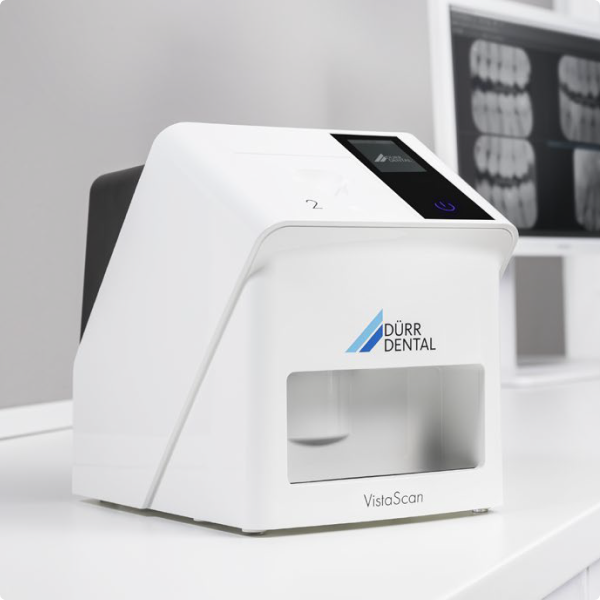
Not only does the new VistaScan Mini Easy 2.0 feature a pioneering design, but it also boasts state-of-the-art technology. It works with the latest image plate technology and enables numerous new AI functions in conjunction with the VistaScan IQ image plate. Combined with the superior image quality of the tried-and-tested PCS technology, it ensures that your practice is well equipped for the future.
Key features:
- Excellent image quality
- High-resolution glass touchscreen display
- Ideal chairside appliance
- LAN interface
Quick and easy scanning : With the Easy Feed concept you can scan image plates very quickly, one after the other. The interchangeable inserts make it possible to digitise all intraoral image plate formats.
Exceptional image quality thanks to PCS : Thanks to PCS technology, the VistaScan Mini Easy 2.0 is capable of reliably displaying even early stages of caries lesions or the finest of bone structures.
Sustainability built in from the start : All our image plate scanners are manufactured with sustainability in mind, and our goal is to achieve CO² neutral production. Other divisions of Dürr Dental are also committed to using resources in the most responsible way possible. With all of our products, it is important for us that we continue to improve energy efficiency and maximise service life by making all our units easy to repair and service. And, of course, last but not least everything is packaged in a safe and eco-friendly way.
Quality and efficiency demand intelligent functions : The VistaScan Mini Easy 2.0 works with VistaScan IQ image plates to ensure that it lives up to its full potential. Alongside the tried and- tested technology and outstanding image quality, this combination offers a wide range of new features that noticeably improve user-friendliness, efficiency and reliability.

Delivery Included


Fast Track allows dental practices to acquire dental equipment quickly, with delivery possible within one week.
Say goodbye to long waiting times and say hello to a hassle-free experience.
Get quality dental equipment fast with FastTrack
Fast Track allows dental practices to acquire dental equipment quickly, with delivery possible within one week.
Say goodbye to long waiting times and say hello to a hassle-free experience.
Get quality dental equipment fast with FastTrack
Fast Track allows dental practices to acquire dental equipment quickly, with delivery possible within one week.
Say goodbye to long waiting times and say hello to a hassle-free experience.
Manuals/Docs
Vistascan-Mini-Easy-Brochure

Enquire Now
Ready to buy new equipment? Speak with our equipment specialist today.Recommended maintenance schedule
Please be aware: Only specialist or personnel trained by Durr Dental may maintain the appliance.
- Before opening the appliance, power it down (e. g. remove plug).
- The recommended maintenance intervals are based on operating the appliance with 15 intraoral images per day and 220 working days per year.
Annual
- Visually inspect appliance.
- Check image plates for scratches, replace if necessary.
Every 3 years
- Replace light protector.
- Replace roll holder.
- Replace drive belt.
Cleaning and Disinfecting
NOTICE - Unsuitable agents and methods can damage the appliance and accessories
- Only use the disinfection and cleaning agents specified or approved by Durr Dental.
- Heed the operating instructions of the disinfection and cleaning agent.
- Wear protective gloves.
Image plate scanner
Unit surfaces
The unit surface must be cleaned and disinfected of contamination or soiling. Use the following cleaning and disinfectant agents:
- FD 322 Quick-acting disinfection
- FD 333 Quick-acting disinfection
- FD 350 Disinfection wipes
NOTICE - Liquid can cause damage to the appliance
- Do not spray the appliance with cleaning and disinfectant agents.
- Make sure that liquid does not get inside the appliance.
- Remove any soiling with a soft, wet, lint-free cloth.
- Disinfect the surface with a disinfection wipe. Alternatively, a spray disinfectant on a soft, lint-free cloth can be used. Heed the operating instructions of the disinfectant.
Input unit
The input unit must be cleaned and disinfected if there is any sign of contamination or visible dirt.
For wiping disinfection, use the following cleaning and disinfectant agents:
- FD 322 Quick-acting disinfection
- FD 333 Quick-acting disinfection
- FD 350 Disinfection wipes
For immersion disinfection, use the following cleaning and disinfectant agents:
- ID 213 Instrument disinfectant
NOTICE - Heat damages plastic parts
- Do not treat parts of the appliance with a thermal disinfector or steam steriliser.
- Press the on/off switch for 3 seconds to switch off the appliance.
- Wait until the operating and communication displays are off and the appliance is completely switched off.
- Press the unlocking button and remove the cover upwards at the same time.
- Clean the cover and inside parts with a moist, soft, lint-free cloth.
- Disinfect the cover and inside parts with a disinfection wipe. Alternatively, a spray disinfectant on a soft, lint-free cloth can be used. Heed the operating instructions of the disinfectant. The cover can also be disinfected in an immersion disinfection system.
- Replace cover.
Light protection cover
The surface must be cleaned and disinfected of contamination or soiling. Use the following cleaning and disinfectant agents:
- FD 322 Quick-acting disinfection
- FD 333 Quick-acting disinfection
- FD 350 Disinfection wipes
- Disinfect the light protection cover with a disinfection wipe before and after placement. Alternatively, a spray disinfectant on a soft, lint-free cloth can be used. Heed the operating instructions of the disinfectant.
- Allow the light protection cover to dry fully before using.
Image plate
Use the following cleaning agents:
- Image plate cleaning cloth
NOTICE - Heat or humidity damages the image plate
- Do not steam sterilise the image plate.
- Do not immerse-disinfect the image plate.
- Only use approved cleaning agents.
- Soiling on both sides of the image plate should be cleaned off with a soft, lint-free cloth prior to each use.
- Remove resistant or dried on dirt with the image plate cleaning cloth. Heed the operating instructions of the cleaning cloth.
- Allow the image plate to dry fully before use.
Protective cover
Use the following cleaning agents:
- FD 350 Disinfection wipes
- Clean the protective cover with a soft, wet, lint-free cloth.
- Disinfect the protective cover with a disinfection wipe.
Storage box with image plate storage tray
If the surface of the storage box and the inside image plate storage tray shows signs of contamination or visible soiling, clean and disinfect.
Use the following cleaning agents for the storage box:
- FD 366 Sensitive disinfection for sensitive surfaces
Use the following cleaning agent for the image plate storage tray:
- FD 350 Disinfection wipes
- Clean the surface of the storage box and the image plate storage tray with a soft, moist, lint-free cloth.
- Disinfect the storage box with spray disinfectant on a soft, lint-free cloth. Heed the operating instructions of the disinfectant.
Disinfect the image plate storage tray with a disinfection wipe. Alternatively, the image plate storage tray can be treated in the thermal disinfector or steam steriliser.
Introduction
Detailed below is a list of messages which may appear on your unit or errors which you may experience. Click on a message to see what this means and what action should be taken.
Before working on the appliance unplug at the mains and remove all power.
Messages below include defective radiograph, software errors and errors on the appliance.
If you do not find the problem below or the action you take does not solve the problem, please contact our support team on 08700 10 20 46. In order to help you, have the serial number of your unit and a description of the error.
X-ray image does not appear on the monitor after scanning
Possible Cause
Image plate has been fed the wrong way round and the inactive side has been read out.
Action
Immediately read the image plate again, inserting the image plate correctly.
Possible Cause
Image data on the image plate was erased, e.g. by ambient light.
Action
Always read the image data of the image plate as quickly as possible.
Possible Cause
Fault in the appliance.
Action
Call our service team on 0800 028 4749.
Possible Cause
No image data on image plate, image plate not exposed.
Action
Expose image plate.
Possible Cause
X-ray appliance is faulty.
Action
Call our service team on 0800 028 4749.
Possible Cause
Wrong cover, the light protection cover has also been drawn in.
Action
Use a cover matching the size of the image plate.
X-ray image too dark
Possible Cause
X-ray dose too high.
Action
Check X-ray parameters.
Possible Cause
Incorrect brightness/contrast setting in the software.
Action
Set the brightness of the radiograph in the software.
X-ray image too bright
Possible Cause
Exposed image plate subject to effects of ambient light.
Action
Always read the image data of the image plate as quickly as possible.
Possible Cause
X-ray dose is too low.
Action
Check X-ray parameters.
Possible Cause
Incorrect brightness/contrast setting in the software.
Action
Set the brightness of the radiograph in the software.
X-ray image only shadowy
Possible Cause
X-ray dose on the image plate too low.
Action
Increase X-ray dose.
Possible Cause
Amplification level (HV value) set too low in the software.
Action
Increase amplification (HV value).
Possible Cause
Unsuitable scanning mode selected.
Action
Select a suitable scanning mode.
Possible Cause
Threshold setting too high.
Action
Reduce threshold setting.
Top or bottom bulge in the X-ray image
Possible Cause
Image plate off-centre and fed at an angle.
Action
Centre image plate and feed straight.
X-ray image is mirror-inverted
Possible Cause
Image plate exposed on the wrong side.
Action
Place image plate correctly in light protection cover.
Position image plate correctly.
Round shadow on the X-ray image
Possible Cause
Plus ID image plate (with marker) exposed on the wrong side.
Action
When taking an X-ray make sure the active side points towards the X-ray tube.
Ghost images or two exposures on the X-ray image
Possible Cause
Image plate double exposed.
Action
Only expose image plate once.
Possible Cause
Image plate not sufficiently erased.
Action
Check the erasure unit is working correctly.
Call our service team on 0800 028 4749 if reoccurs.
X-ray image mirrored on a corner
Possible Cause
Image plate bent during X-ray exposure.
Action
Do not bend the image plate.
Shadow on the X-ray image
Possible Cause
Image plate removed from the light protection cover before reading.
Action
Do not handle an image plate without a light protection cover.
Store the image plate in a light protection cover.
X-ray image cut off, a part missing
Possible Cause
Metal part of the X-ray tube is in front of the X-ray beam.
Action
When taking an X-ray, make sure there are no metal parts between the X-ray tube and patient.
Check the X-ray tube.
Possible Cause
Edge masking defective in the imaging software.
Action
Deactivate edge masking.
Software cannot combine the data to make a complete image
Possible Cause
X-ray dose on the image plate too low.
Action
Increase X-ray dose.
Possible Cause
Amplification level (HV value) set too low in the software.
Action
Increase amplification (HV value).
Possible Cause
Unsuitable scanning mode selected.
Action
Select a suitable scanning mode.
Possible Cause
Threshold setting too high.
Action
Reduce threshold setting.
X-ray exposure has stripes on image
Possible Cause
Image plate pre-exposed, e.g. by natural radiation or scattered X-ray radiation.
Action
If the image plate has been stored for longer than one week, erase the image plate again prior to use.
Possible Cause
Parts of the image plate were exposed to light during handling.
Action
Do not expose used image plates to bright light.
Read image data within 30 minutes of the exposure.
Possible Cause
Image plate was soiled or scratched.
Action
Clean image plate.
Replace scratched image plate.
Light stripes in the scanning window
Possible Cause
Too much stray light entered during scanning.
Action
Darken the room.
Turn the appliance so that the light does not fall directly onto the input unit.
Horizontal, grey lines on the X-ray image, beyond the left and right image edge
Possible Cause
Slipping transport.
Action
Clean transport mechanism, replace transport belts if necessary.
X-ray image is distorted lengthways with light, horizontal stripes
Possible Cause
Wrong light protection cover or image plate used.
Action
Only use original accessories.
X-ray image split vertically into two halves
Possible Cause
Dirt in the laser slit (e.g. hair, dust).
Action
Clean laser slit.
X-ray image has small light dots or clouding
Possible Cause
Micro scratches on the image plate.
Action
Replace image plate.
Lamination of the image plate detached at the edge
Possible Cause
Wrong holding system used.
Action
Only use original image plates and film holding system.
Possible Cause
Image plate handled incorrectly.
Action
Use the image plate correctly.
Heed the operating instructions of the image plate and film holding system.
Too much ambient light
Possible Cause
Appliance is exposed to too much light.
Action
Darken the room.
Turn the appliance so that the light does not reach the entry slot directly.
Incorrect power unit
Possible Cause
Incorrect power unit has been connected.
Action
Use the power unit provided.
Excessive heating
Possible Cause
Laser or erasure unit too hot.
Action
Switch off the appliance and allow to cool.
Erasure unit fault
Possible Cause
LED soiled or defective.
Action
Call our service team on 0800 028 4749.
Imaging software does not detect the appliance
Possible Cause
Appliance not switched on.
Action
Switch the appliance on.
Possible Cause
Connecting cable between appliance and computer not connected correctly.
Action
Check the connecting cable.
Possible Cause
Computer does not detect connection to the appliance.
Action
Check the connecting cable.
USB driver not installed or inactive.
Check network setting (IP address and subnet mask).
Possible Cause
Hardware fault.
Action
Call our service team on 0800 028 4749.
Appliance does not appear in the VistaConfig options list
Possible Cause
Appliance is set up behind a router.
Action
Configure IP address without intermediate router on the appliance.
Connect the router in between again.
Manually enter the IP address in VistaConfig and register the appliance.
Appliance appears in the VistaConfig options list but connection is not possible
Possible Cause
Subnet masks of the computer and the appliance do not agree.
Action
Check subnet masks, match if necessary.
\"E2490\" error
Possible Cause
Appliance connection has been lost while software still wants to contact the appliance.
Action
Restore the appliance connection.
Repeat procedure.
Error in data transmission between appliance and computer. \"CRC Error Timeout\" error message
Possible Cause
Wrong or too long connecting cable used.
Action
Only use original cable.
Appliance does not switch on
Possible Cause
No supply voltage.
Action
Check mains cable and plug connection, replace if necessary.
Check power unit.
If the green display does not light, replace the power unit.
Check the main fuse box in building.
Possible Cause
On/off switch defective.
Action
Call our service team on 0800 028 4749.
Appliance switches back off after a short time
Possible Cause
Mains cable or one of the plugs has not been inserted correctly.
Action
Check the mains cable and all connections.
Possible Cause
Hardware defective.
Action
Call our service team on 0800 028 4749.
Possible Cause
Mains supply voltage too low.
Action
Check the supply voltage.
Appliance is on but no display (status, error or operating display) lights
Possible Cause
Display defective.
Action
Call our service team on 0800 028 4749.
Loud noises during operation after switching on, longer than 30 seconds
Possible Cause
Radiation deflector defective.
Action
Call our service team on 0800 028 4749.
Appliance does not react
Possible Cause
Appliance has not yet completed boot procedure.
Action
Wait 20 - 30 seconds after switching on until the boot procedure has completed.
Possible Cause
Appliance is blocked by the firewall.
Action
Enable the ports for the appliance in the firewall.
Image plate does not fit into the intake slot
Possible Cause
Wrong cover used.
Action
Use a cover matching the size of the image plate.
Light protection cover slips into intake slot together with image plate
Possible Cause
Incorrect (too big) cover used.
Action
Use a cover matching the size of the image plate.
Red status display flashes
Possible Cause
Cover or light protector is missing or not correctly in position.
Action
Attach cover and light protector correctly.
Blue communication display flashes
Possible Cause
No connection between appliance and computer.
Action
Check cable and cable connection.
Activate appliance via software.
Activate or install USB driver.
Possible Cause
Data memory in the appliance is full.
Action
Use software to set up state of readiness. The image data is automatically transferred from the appliance to the software.
Share


Services and Solutions
)
Fast Track Service
Fast Track allows dental practices to acquire high-quality dental equipment quickly, without having to wait for long periods.
)
Increasing your practice value
By investing in latest technologies, updating your equipment, and increasing your availability with a new surgery room, you can attract new patients, improve the quality of care you offer, and differentiate your practice from competitors.
)
)
Henry Schein Financial Services
A vast range of financial products and services that are offered through our finance partners nationally
SunSchein Clearance
SunSchein offers a wide range of ex-showroom and ex-demonstration dental equipment, including treatment centres, laboratory equipment, and digital dentistry equipment.
Dental Equipment
Uncover everything you need for your dental practice, from essential dental equipment to cutting-edge solutions.