Formed by former GOJO managers, SVEMA offers the same quality soap, gels and dispensers you have come to know and trust previously from GOJO.
This includes the Denali-M and Logan-M manual dispensing solutions and Denali-A and Logan-A smart and flexible automatic solutions suitable for all environments.
Installing 60 units or more?
If your facility requires the installation of 60 or more dispensers at a single site or within a single geographical area, the SVEMA team will provide free on-site installation support.
Installation includes the removal of old GOJO/PURELL dispensers and secure mounting of the new SVEMA units.
If not, please use the installation guidance below to safely fit your units.
3. Dispensers Installation:
- Remove the protective film from the adhesive tape located on the back of the dispenser.
- Press the dispenser firmly against the wall for 30 seconds, ensuring the entire adhesive surface makes contact.
Option A - Adhesive Tape:
- Remove the protective film from the adhesive tape located on the back of the dispenser.
- Press the dispenser firmly against the wall for 30 seconds, ensuring the entire adhesive surface makes contact.
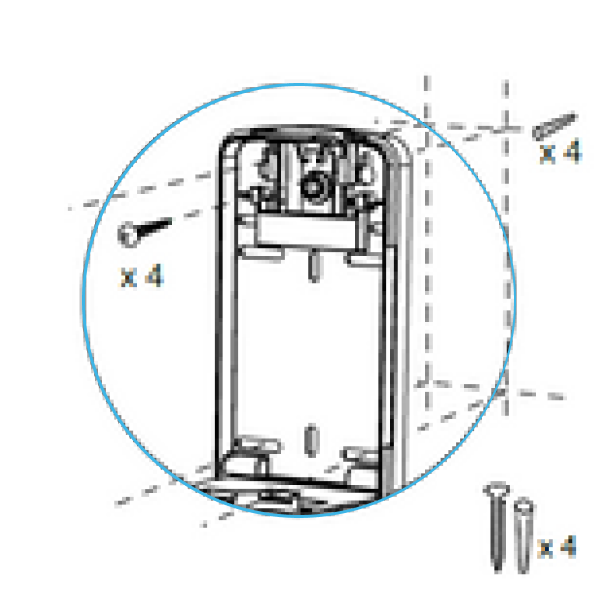
Option B – Screws:
- Use the included kit: 4 screws and 4 wall plugs
- Hold the dispenser’s back plate against the wall and mark the drilling points.
- Drill the holes, insert the wall plugs, and secure the dispenser with screws.
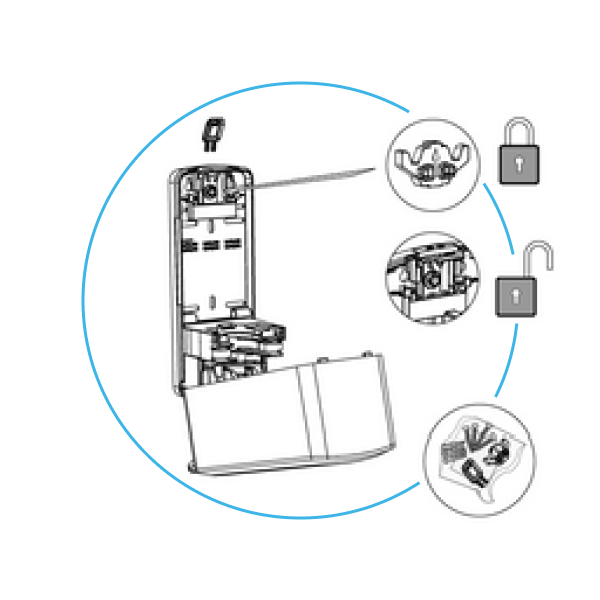
4. Opening the Dispensers and Installing the Lock:
Option A - Without Lock (default):
- To open the dispenser, simply press the button or use the key.
Option B - With lock:
- Install the included safety element (lock). Once installed, the cover can only be opened using the key.
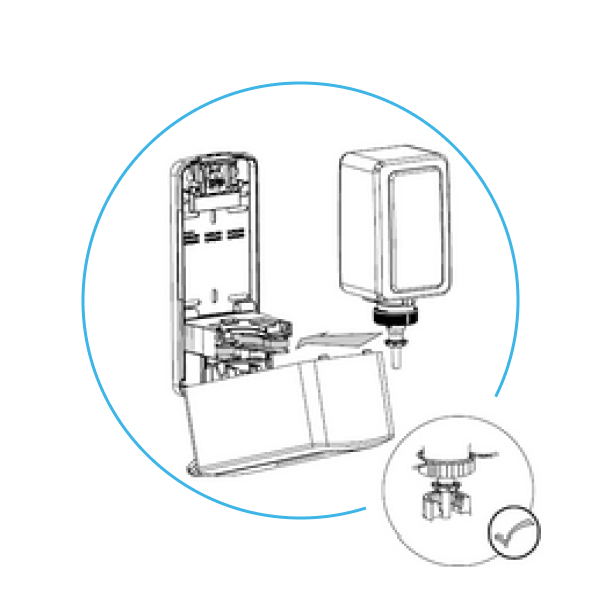
5. Refill Installation:
- Remove the protective seal from the pump.
- Insert the refill with the hand care product.
- Close the dispenser housing.